
Time needed: 5 minutes.
We teach you the exact steps on how to transfer a photo from a digital photo frame to a computer in just a few short minutes. You’ll learn how to get any photo from your Pix-Star digital frame to your computer as quickly as easily as possible. You’ll need access to the pix-star.com web interface on a computer to complete these steps. Don’t worry, the dashboard is very intuitive and easy to use – and we’ll guide you through every step of the way.
Make sure your Pix-Star digital frame is connected to Wi-Fi and ready to go. Get your computer and let’s move onto the steps!
- Login to your pix-star.com dashboard
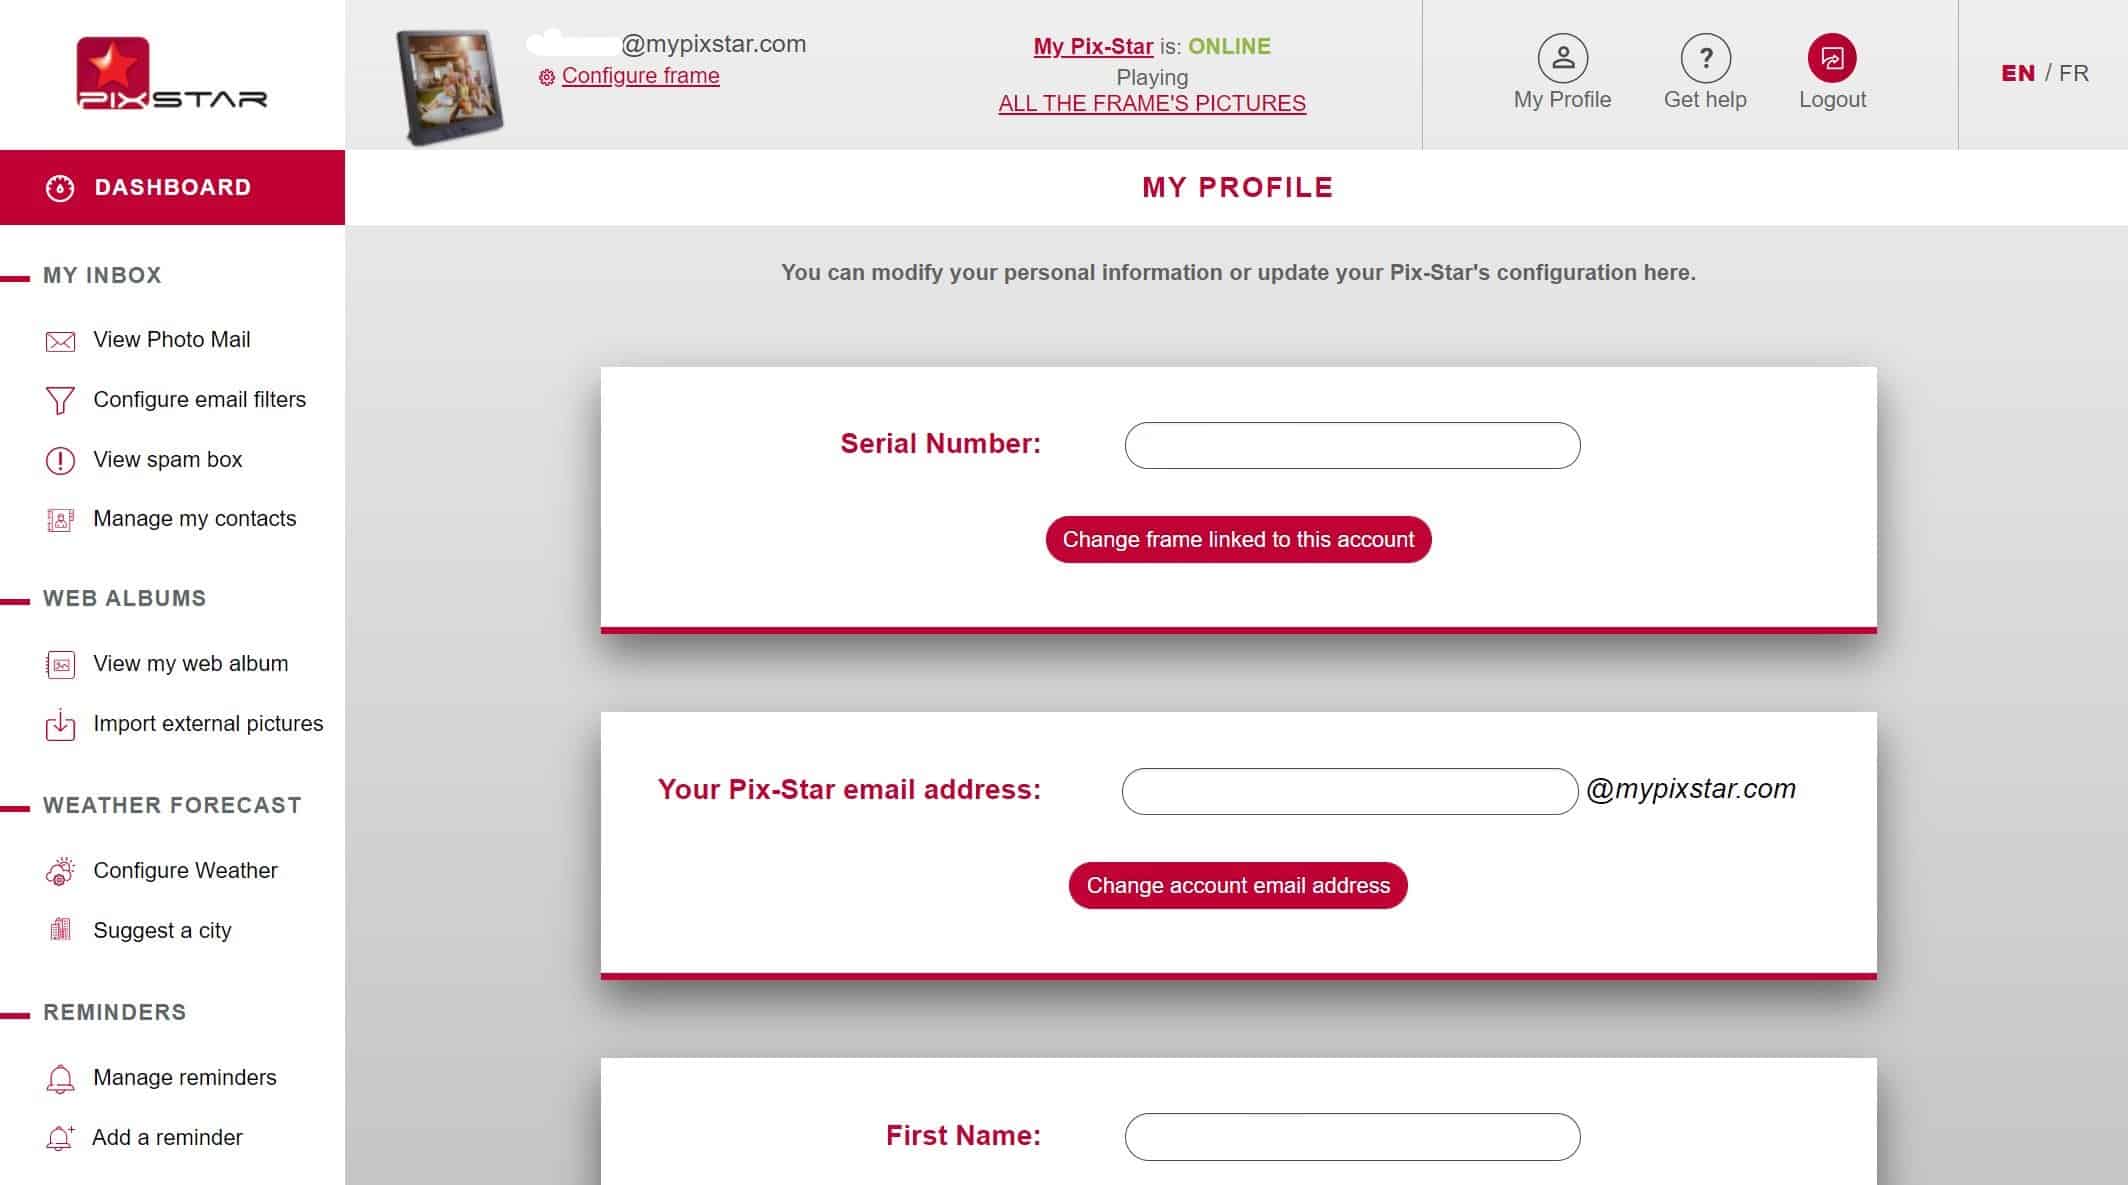

Head over to pix-star.com and click the “login” button at the top of the page. If you haven’t registered your digital frame before, click on the “register a new frame” option and follow the onscreen instructions. Note that you can find the serial number of your Pix-Star frame in the “About” section of the “Settings” page (accessed through your home screen).
Once you’ve logged into your Pix-Star account, click on your frame’s name (email address) just to the left of the “log out” button. If the status isn’t “online”, go back and make sure your Pix-Star is connected to Wi-Fi and powered on. Once you’ve clicked, you’ll be taken to your Pix-Star dashboard. This is where you can manage all connected frames, link and sync web albums, delete photos, remotely control your Pix-Star frame, and most important to this guide – download your frame’s photos to your computer. - Download your photo-mail to your computer
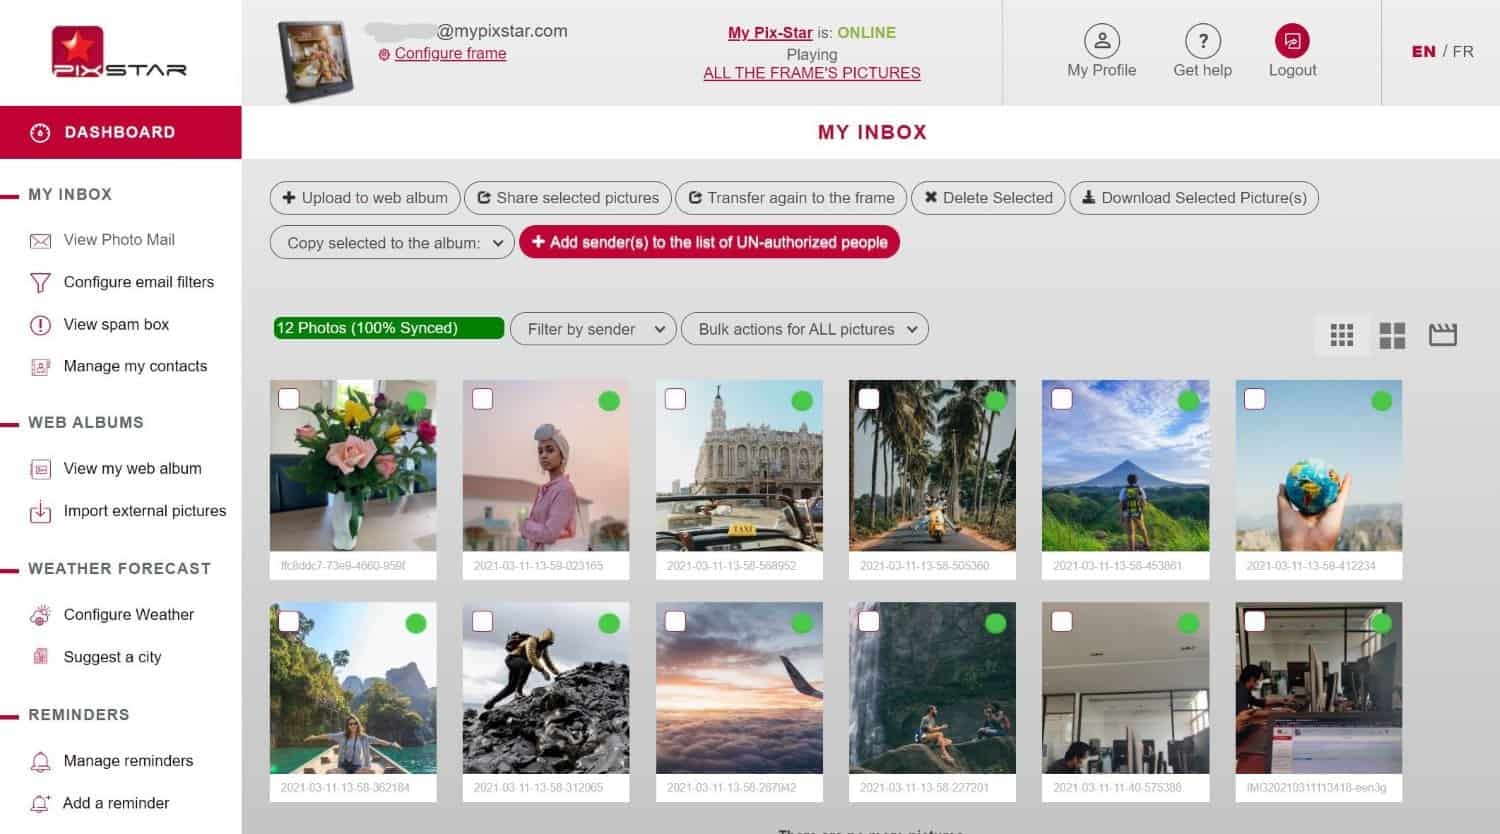
In the left-hand panel in your Pix-Star dashboard, click on the “View photo-mail” tab. This will show you all the pictures you’ve sent to your Pix-Star digital photo frame by email and through the mobile app. These are all sent to your frame’s unique email address, which is why they’re grouped together in one place.
If you only want to download a selection of the photos (not all the photos) to your computer, you need to manually select each picture/folder you want to download. The green dot on the top right corner of each photo means that the picture has already been sent to your Pix-Star frame. Once you’ve selected all the photos & folders you want to download, click the “Download the selected picture(s)” option at the top of the panel. This creates and downloads a zipped folder containing all the photos you just selected.
If you want to download all the photos in this section, simply click on “Bulk actions for ALL pictures”. From the drop-down list, click on “Download ALL pictures to the computer”. Again, this creates a zipped folder with all the photos in the “View photo-mail” section. - Download your web albums
Web albums are photos and albums that have been linked and synced from external sources like social media profiles and photo-sharing platforms. While web albums are saved to the frame’s internal storage, they can only be edited and changed through the web interface.
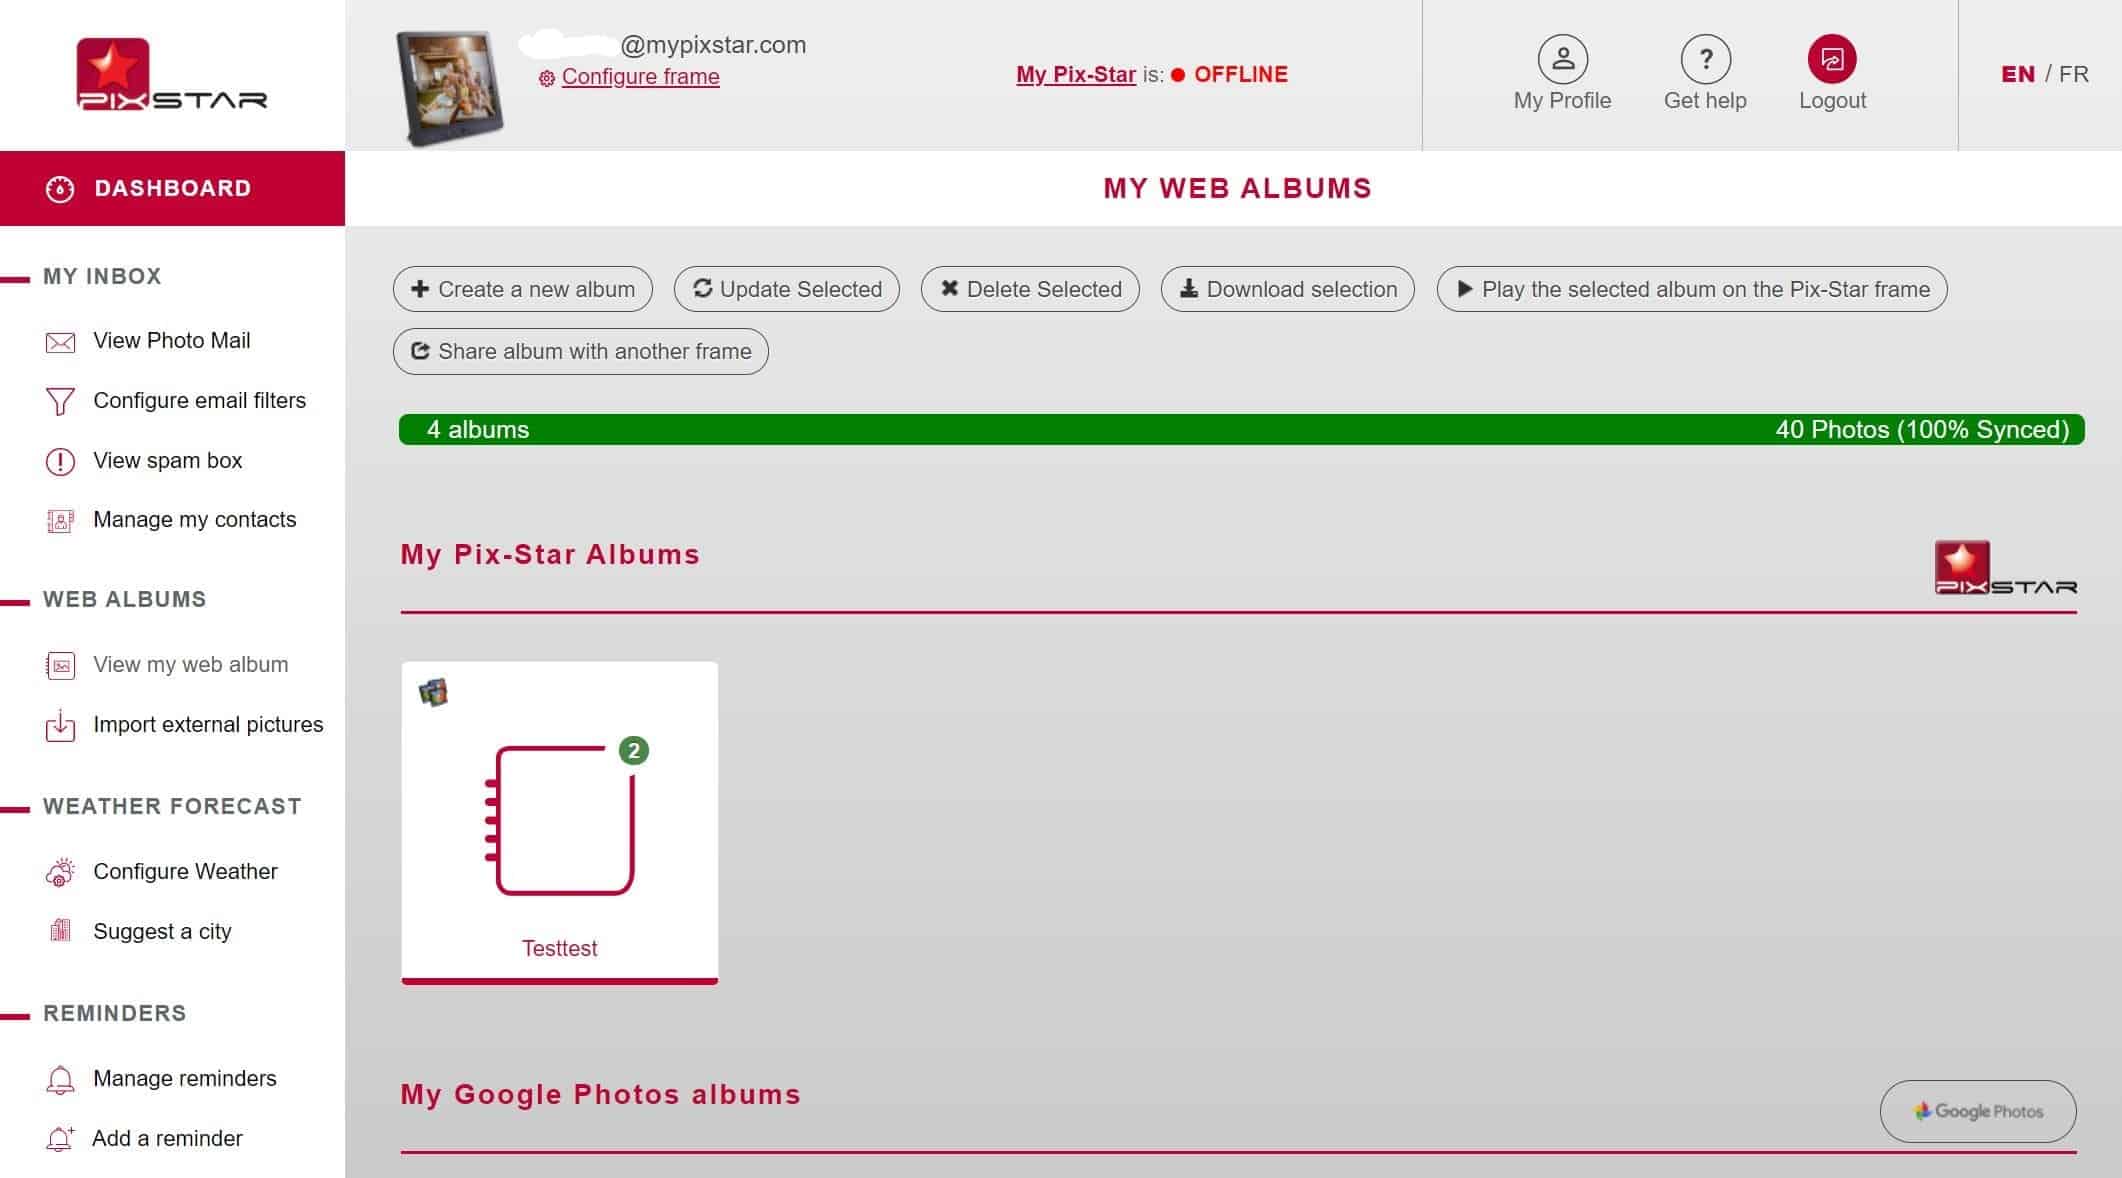
From your Pix-Star dashboard, locate “Web Albums” if the left panel and click “View my web albums”. This page shows you all the web albums you’ve linked to your Pix-Star digital photo frame in the past. To download an album, simply click the check box for the album. You can only download one web album at a time.
Once you’ve chosen your desired web album, click on “Download selection” at the top of the page. This creates a zipped folder with all the photos inside that album and downloads it to your computer. - Copy the photos from the frame to a USB
One final way to get photos to your computer without using the web interface is by USB/SD card. Make sure to create a new folder for the photos before inserting it into the frame. When the USB/SD card is inserted into your frame a popup list will show. Choose “Open the USB(SD) & browse files inside” and press “ok”.
From the Pix-Star’s main menu, go to “My picture, videos & audio messages” and press “ok”. Under the Pix-Star tab or web album tab, select all the photos you want and click “Copy selection to…” in the left-hand panel. Here you need to choose the USB or SD card you inserted, and choose the folder you create beforehand to copy all the selected pictures.
Remove the USB/SD card from the Pix-Star frame once the copying is done and transfer all the photos to your computer. Photos under the “Pix-Star” and “Web Albums” tabs need to be copied separately as they are stored in different places on the frame’s internal storage.
Final Thoughts
Well done! You’ve got everything you need to get started. We’ve learned how to transfer photos from a digital photo frame to a computer in a couple of different ways. Even if you don’t have access to the pix-star.com web interface, we showed you how you can transfer photos onto a USB/SD card first – then to your computer. Now go try it out for yourself and enjoy how simple the process is!