
Time needed: 5 minutes.
Learning how to remotely control a digital photo frame can work wonders for your home & family – especially if you have elderly users that want to get more involved. Remote control functionality is a feature that’s usually only found among a handful of the best digital photo frames like the Pix-Star. In this guide, we’ll be looking specifically at the Pix-Star digital photo frame and how to remote control it. We cover the 6 important steps that you need to know to get started the right way. Let’s dive in!
- Make sure your frame is online & registered

The first step in learning how to remotely control a digital photo frame is to get your frame online & registered. With Pix-Star’s digital photo frame, this is done when first setting up the frame. An online frame simply refers to one that’s connected to Wi-Fi and registered on the web interface.
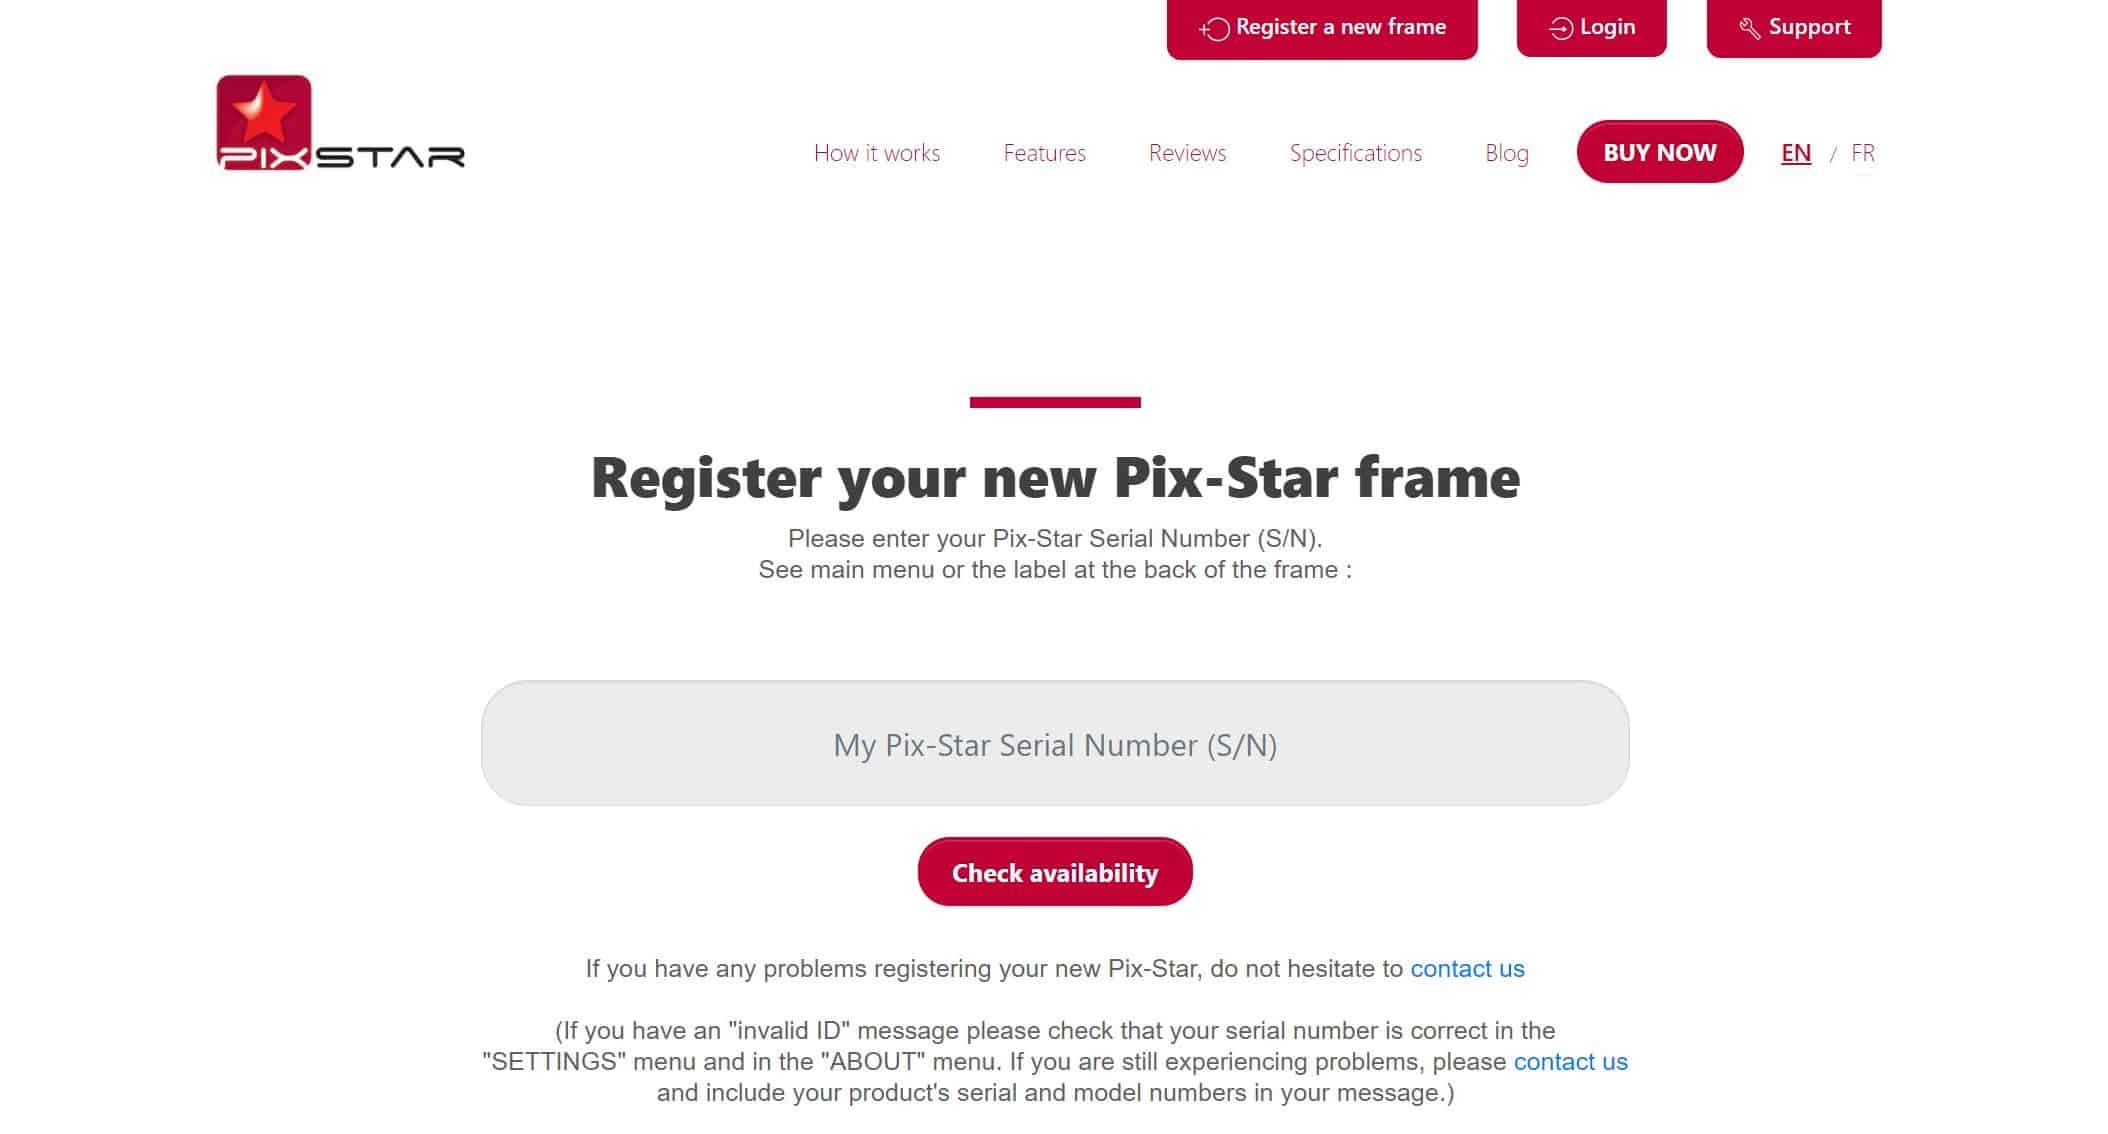
To register your new Pix-Star digital photo frame, head over to pix-star.com and click on “Register a New Frame” at the top of the window. Here you need your frame’s serial number. Find it in your frame’s “About” section by accessing the frame’s “Settings” page from its home screen. Simply type the serial number into the box and click on “Check Availability”.
It should only take a couple of seconds to check that your digital photo frame hasn’t been previously registered. Once it’s been marked as available, simply follow the on-screen instructions to complete your Pix-Star frames registration process.
Another important point worth noting when connecting to Wi-Fi is that digital photo frames can’t connect to Wi-Fi networks that require web authentication. This is common with Wi-Fi networks at hotels & coffee shops, though some routers may require web authentication (not very common). - Log in to your web dashboard
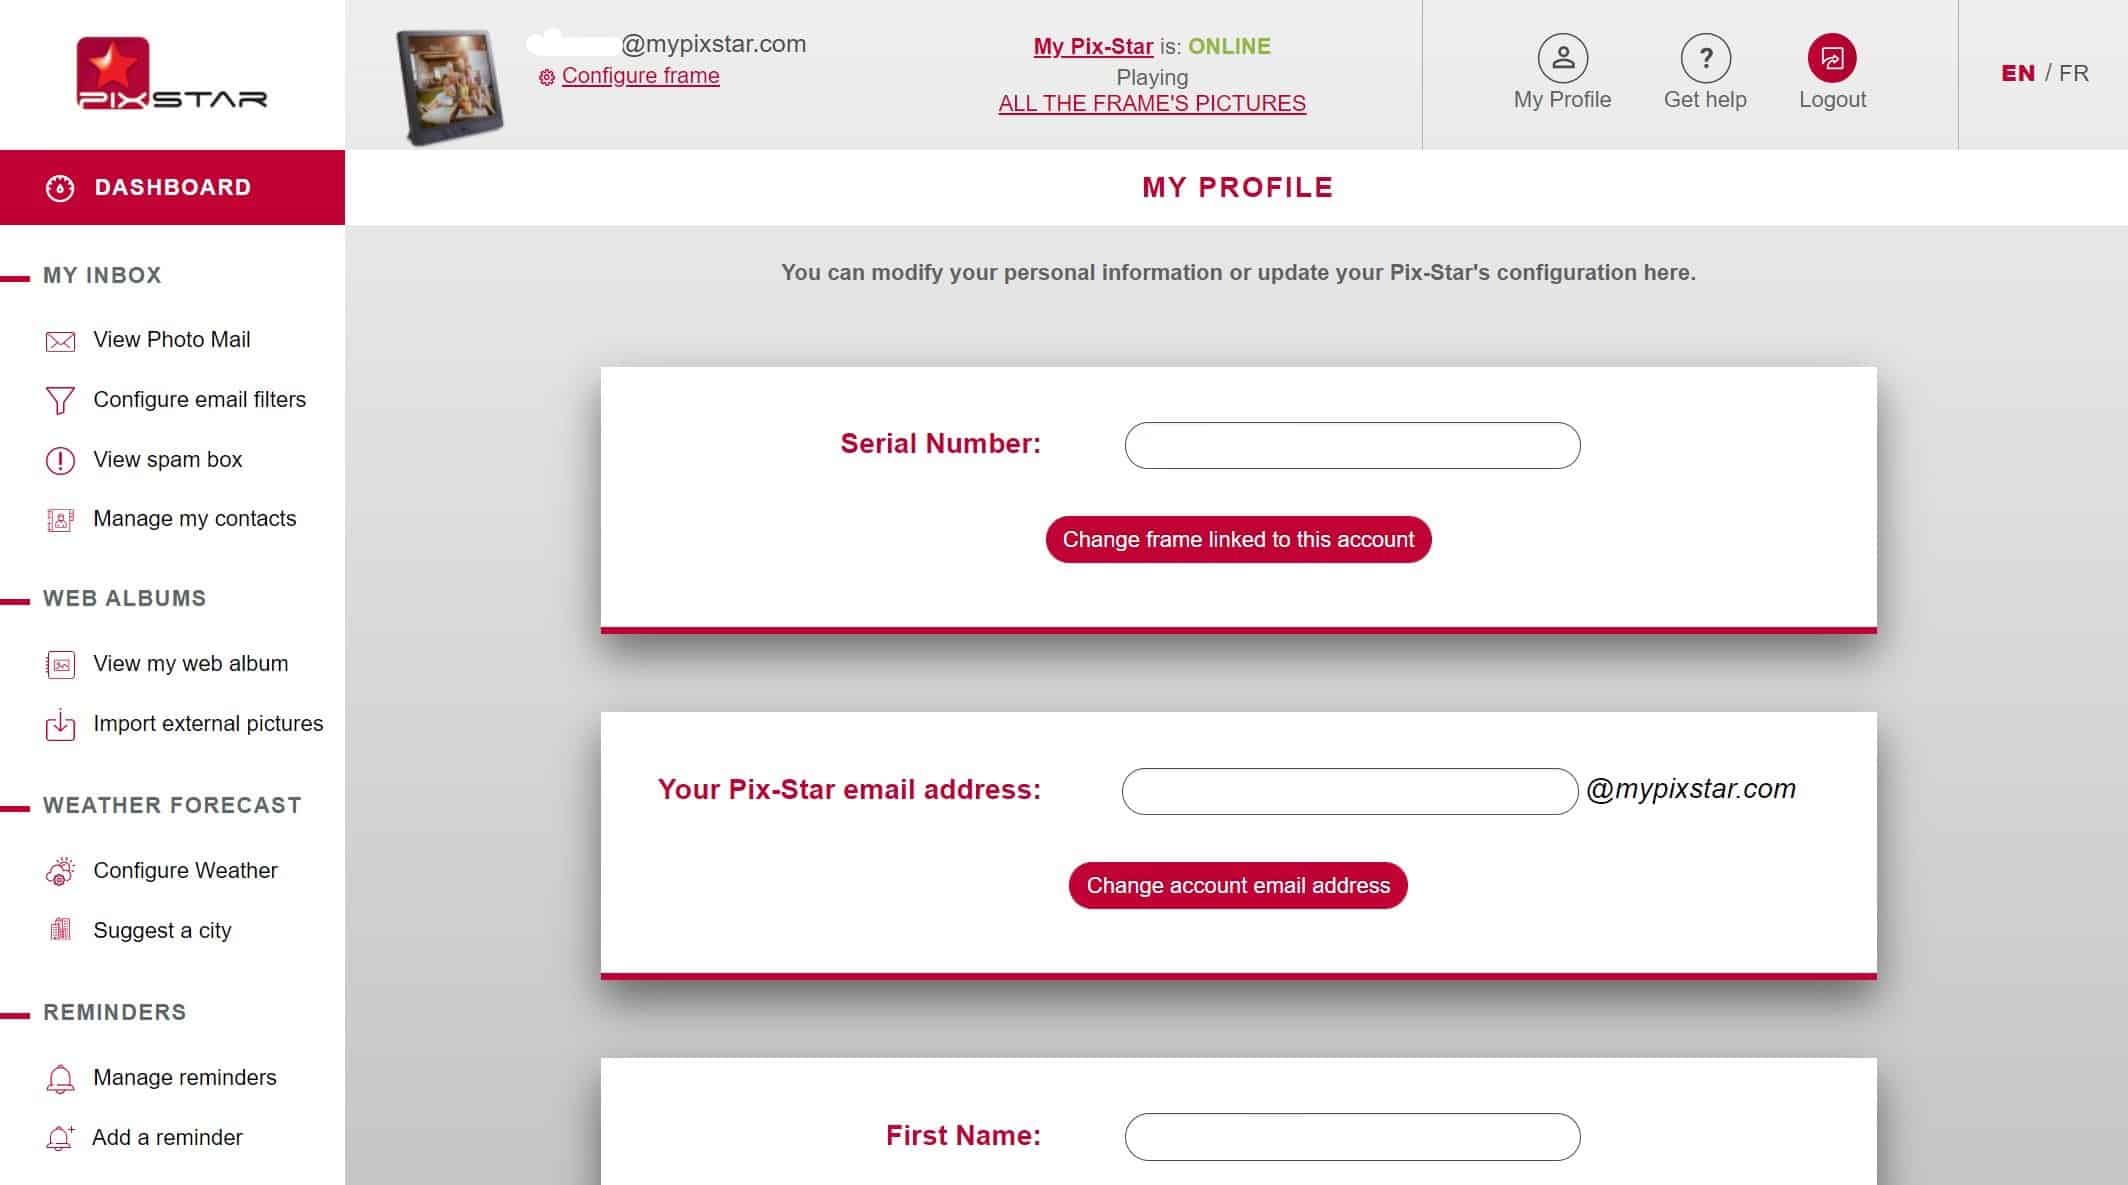
Once you’ve registered your Pix-Star digital photo frame and got it online, it’s time to log in to your web dashboard. This dashboard is where you can remotely control a digital photo frame, link & sync web albums, and manage the cloud storage for all of your connected Pix-Star frames. Make sure you have the log-in information from step 1 handy as you’ll need them in a moment.
Head over to pix-star.com and click on “Login” at the top of the window. Here you’ll be asked to input your unique “@mypixstar.com” email handle. You should have received this information when you purchased the frame (via email). Input the email username & password then click on “Login”. This is also where you’ll log in to your multi-frame control account if you’ve purchased several frames and want to control all of them at the same time.
You will be sent directly into your frame’s web dashboard. Take a couple of minutes to get familiar with all the features & functions offered in the interface. This is where you can link web albums, manage cloud storage for your connected frames, and remotely control any of your digital photo frames. - Click on “My Frame Configuration”
Near the bottom end of the left-hand panel, find the “My Frame Configuration” option and click on it. Before you click on this option, you may want to adjust your profile settings, change your access password, or add any other frames to your user account. If you’re ready to get straight into remotely controlling your Pix-Star frame, click on “My Frame Configuration” and move on to step 4.
If you get a message at the top of the display that your frame is offline, make sure it’s connected to Wi-Fi. If you’re still having trouble getting it to show as online, simply restart the frame by turning it off, unplugging it, and waiting a moment. Plug the frame into the power outlet and start it up again. This should fix any issues with your Pix-Star digital photo frame not appearing online.
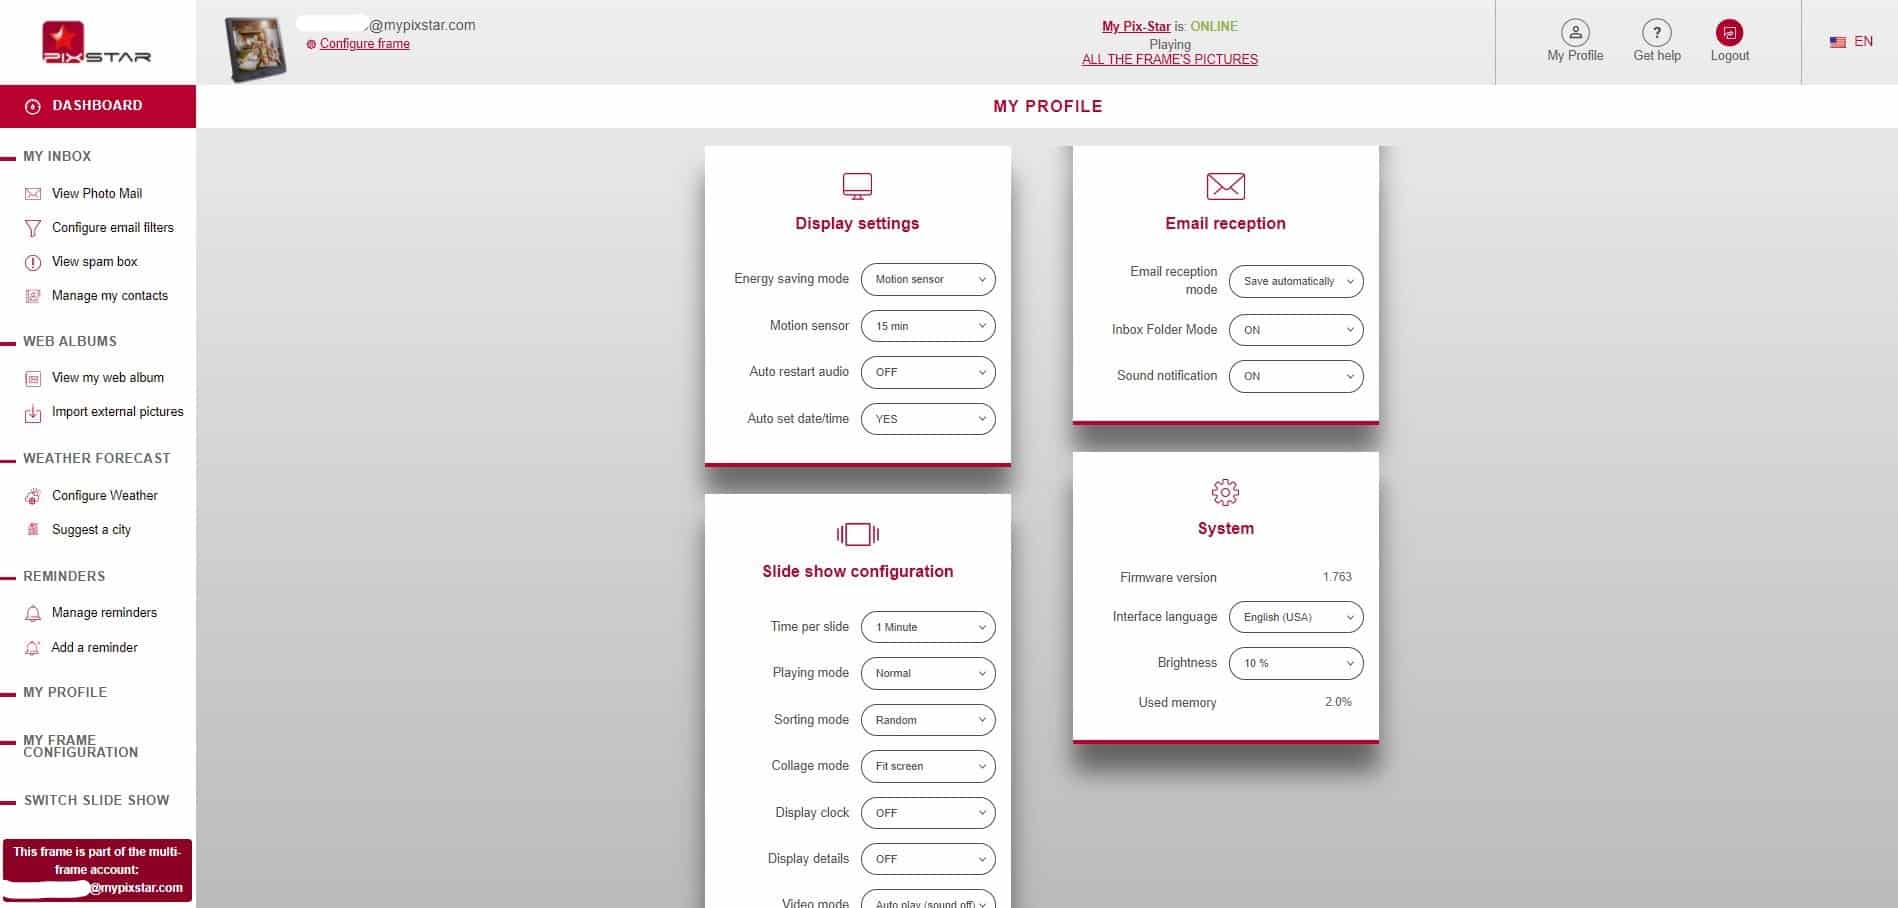
When you get redirected to the “My Frame Configuration” page, you will see the four categories: display settings, an email reception, slide show configuration, and system. Each of these categories lets you adjust a different area of your frame’s settings. While you don’t have 100% control over every setting your frame has to offer, you can adjust all of the important settings remotely. - Adjust display settings
Here you can adjust the digital photo frame’s motion-sensor auto-on/off time limit, auto-power on/off schedule, auto-restart, and date/time settings. They only take a couple of moments to reflect on the frame. They’re great for elderly users as these settings can often be rather confusing as the results aren’t seen immediately. - Manage slideshow settings & preferences
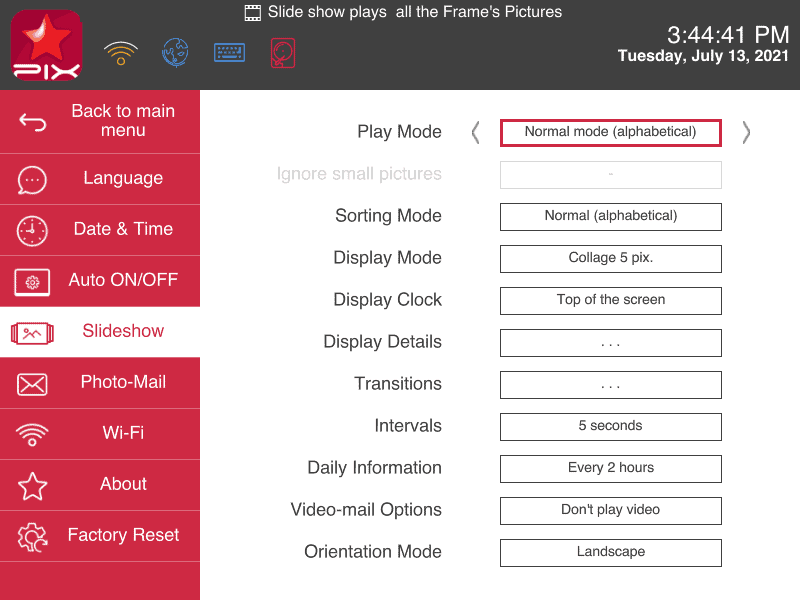
Here you can adjust the slideshow settings that apply to current slideshows (and slideshows in general). The time per slide refers to the transition speed between photos being played in the slideshows. Playing mode lets you adjust the frequency at which photos are played (newest photos only & repeat new photos more often).
Sorting mode lets you adjust the play order of photos. You can choose between randomized play order, newest first, or oldest photos first. This setting will take effect on the current slideshow, but will also affect any subsequent slideshows.
Collage mode lets you create unique photo collages. You can adjust the number of photos to be included in the collage, and even set photos to intelligently fit the screen. This is great for photos that don’t match the 4:3 aspect ratio of Pix-Star’s digital photo frames.
Video mode lets you decide whether videos are to be included in slideshows. You can also adjust whether or not they should play their original sound or play muted. If you want to view videos, but not in slideshows, you can view them directly (individually) from the frame’s media gallery. - Change system & email reception settings

Here you can set whether photos received to the frame’s email address are automatically saved to the frame’s internal storage. This is a fantastic setting for families that want to control who can send photos to which digital photo frames.
It’s a great way to offer an extra layer of protection if there will be kids viewing the slideshows. You can also manage notifications for incoming photos – which is important if you set the frame to request manual acceptance for new photos & videos.
System settings let you view the current firmware version, change the interface language, and even adjust the display’s brightness. Colors settings like hue, temperature, and saturation can be adjusted too – but this needs to be done directly on the frame.