
Time needed: 5 minutes.
Here we’re going to learn how to set up a digital photo frame in under 5 minutes. You’ll learn the most important steps in getting your Pix-Star frame ready to go. We’ll even show you how to send your first pictures and start your first slideshow. Let’s get started!
- Connect to Wi-Fi

This is arguably the most important step in how to set up a digital photo frame. Pix-Star’s digital photo frame features extensive Wi-Fi connectivity and functionality. Many features and functions rely directly on Wi-Fi, which is why we need to get it ready as soon as possible.
Power your Pix-Star digital photo frame on and give it a short while to ready up. If this is the first time you’re starting the frame up, the setup wizard will guide you through the whole setup process. For connecting to Wi-Fi, make sure you choose a network that you have full access and control over. Since digital photo frames don’t have inbuilt internet browsers, you can’t connect to Wi-Fi networks that require web authentication (coffee shop Wi-Fi for example).
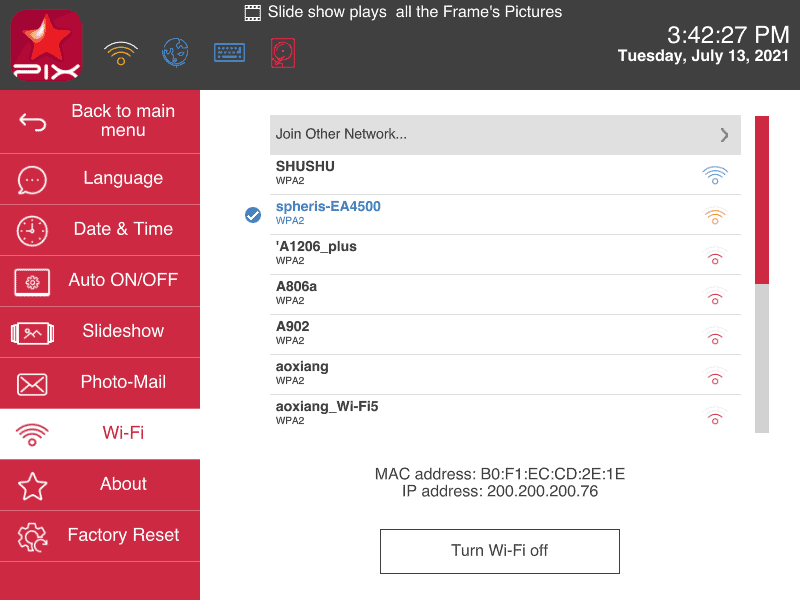
If you’ve already used the frame before, or simply need to switch to a new Wi-Fi network, go to “Settings” from the frame’s home screen. Scroll down to “Wi-Fi” in the left-side panel and press “OK”. Select your Wi-Fi from the list of available connections and press “OK”. Input the password for the network and click “Join”.
Give the frame a moment to connect and show as online. You should see a Wi-Fi symbol in the top left corner of the screen with the signal strength. Also, make sure that the globe icon is blue as it means the frame is online and ready to use. - Register on the web interface
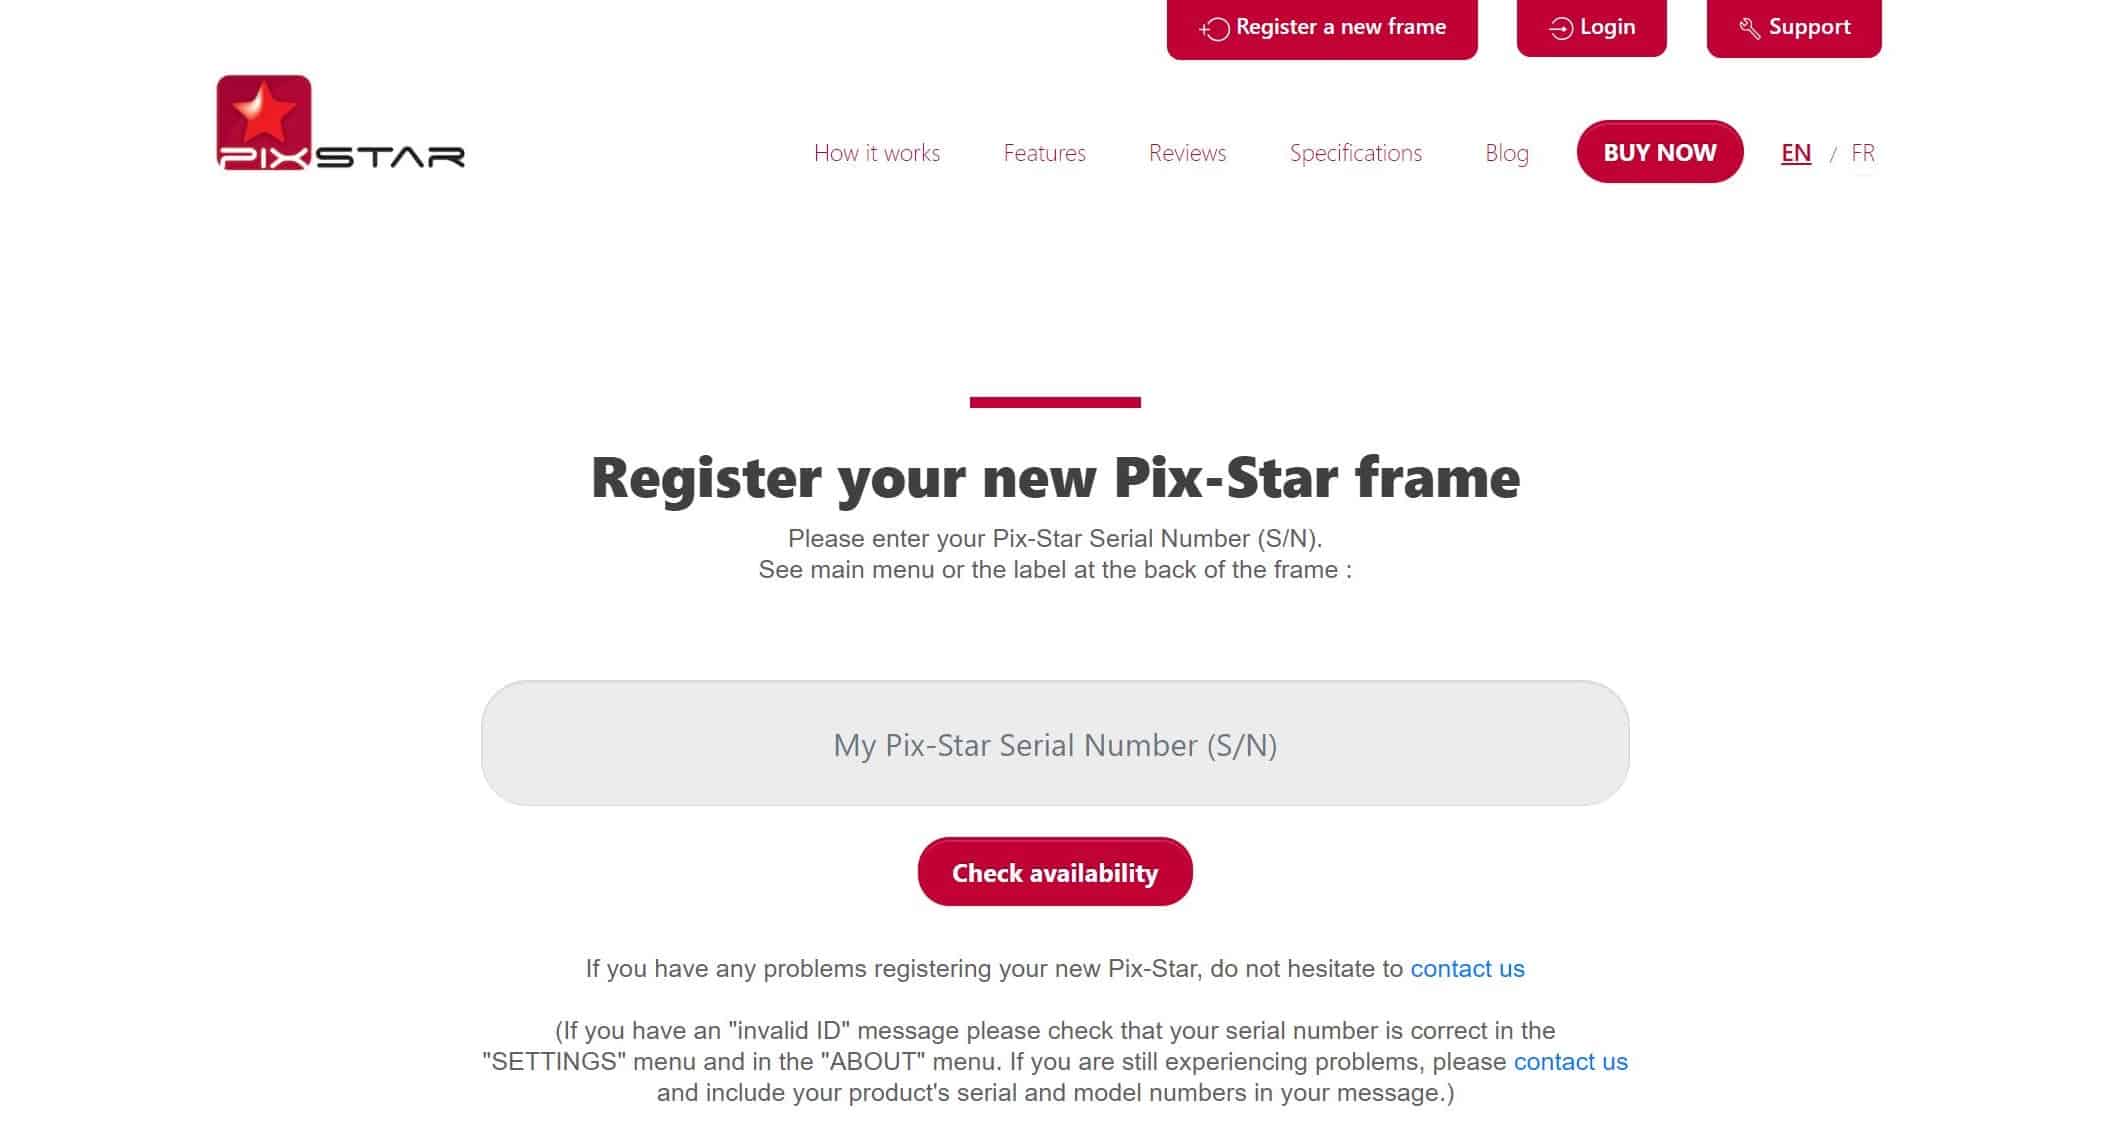
Once you’ve connected to Wi-Fi, the next step in learning how to set up a digital photo frame is to get registered. Head over to pix-star.com and make sure your frame is online and powered on. Click on “Register a new frame” at the top of the window – this will require you to input your Pix-Star frame’s serial number. This number can be found in the “About” section of the frame’s “Settings” page. Input the number and follow the remaining on-screen instructions.
Once you’ve registered your frame, note the frame’s email address and assigned password while registering as you’ll need it when logging into your dashboard. Click on “Login” at the top of the page and input your frame’s details. This takes you to your frame’s dashboard where you can control cloud storage, import photos, and remotely control any connected Pix-Star digital photo frame.
Now that your frame is registered, you’re ready to import pictures from social media, photo-sharing sites, and cloud storage platforms. You can also import pictures directly from your computer to your frame. This dashboard offers a great way to start slideshows and change settings remotely from anywhere in the world. - Add your frame to the mobile app
Download the Pix-Star Snap mobile app from either the Play Store or the App Store. This app can be used on phones and tablets and is compatible with both iOS and Android. The Pix-Star Snap mobile app lets you send photos, videos, and audio messages to any connected Pix-Star frame from anywhere in the world.
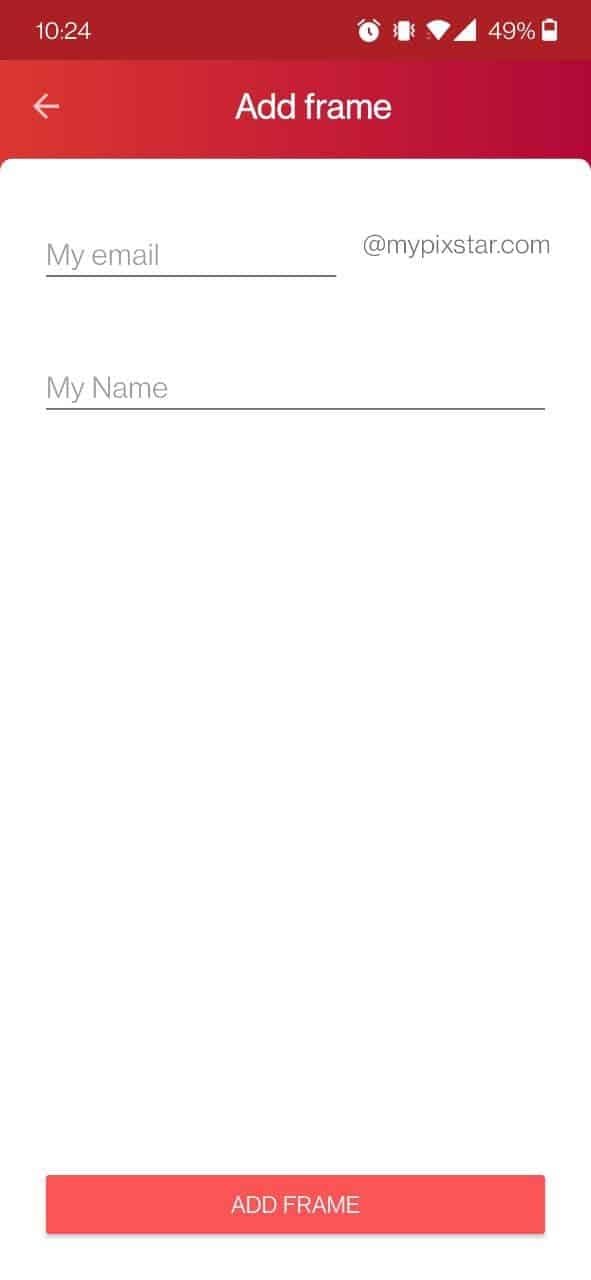
To add your Pix-Star frame to the mobile app, open the app and click on any of the sending options. Select or capture the photos/videos you want to send to your frame and hit the send icon/red checkmark. This will then take you to the “Pix-Star Frame” screen. Click on “Add a Pix-Star frame” at the bottom of the screen. Input your frame’s unique email address and the nickname you want to assign to it. Press “Add Frame”.
You can add multiple Pix-Star frames to the Pix-Star Snap mobile app. Once a frame has been added, it doesn’t need to be added again. You simply have to select it from the list of connected frames. Note that you can send photos and other media to multiple Pix-Star frames at the same time (up to 250 pictures at once). Now you can start using the Pix-Star Snap mobile app to send photos to connected frames from anywhere in the world! - Fine-tune your frame’s settings
On your Pix-Star frame, head over to the “Change Settings” page from the home screen. Here you can make your way through all the frame’s settings to fine-tune them to your liking. You can adjust settings like language, date & time, motion sensor settings, auto-on/off, slideshow settings, photo-mail settings, Wi-Fi, and update the firmware.
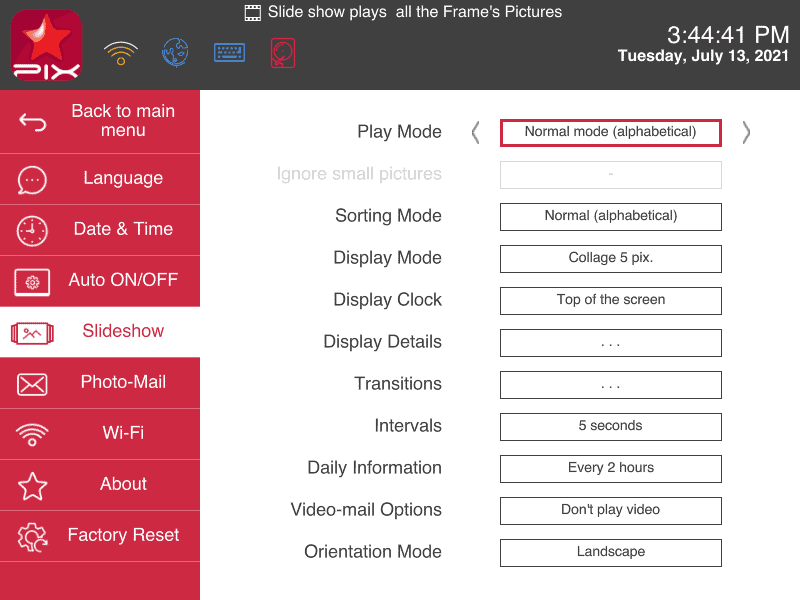
“Slideshow” settings are very important to get right before viewing your photos. You can set the frame to ignore small pictures that don’t fill enough of the screen. You can also set your Pix-Star frame to ignore older photos – or to play more recent pictures more frequently.
There are loads of customization settings for slideshows that change the speed, style, and type of transitions. You can also switch between orientations and even choose to include videos in slideshows.
Another way to adjust settings is directly inside a slideshow (without needing to back out to the main menu). Simple press the “Menu” button while viewing a slideshow. This brings up a list of options that include deleting photos and adjusting slideshows settings without leaving the slideshow. - Send pictures & start slideshows
Now you are ready to start sending pictures and other media to your Pix-Star frame. To send pictures by email, add them as attachments and address the email to your frame’s unique email address. Make sure to add them as attachments and don’t drag and drop them into the “body” section of the email.
Send pictures to your frame using the Pix-Star Snap mobile app. You can send to multiple frames at the same time and can send up to 250 photos in one go. Pix-Star Snap also lets your send video clips and audio messages up to 2-minutes long. Videos can be played muted or with their sound using the Pix-Star frame’s inbuilt speakers.
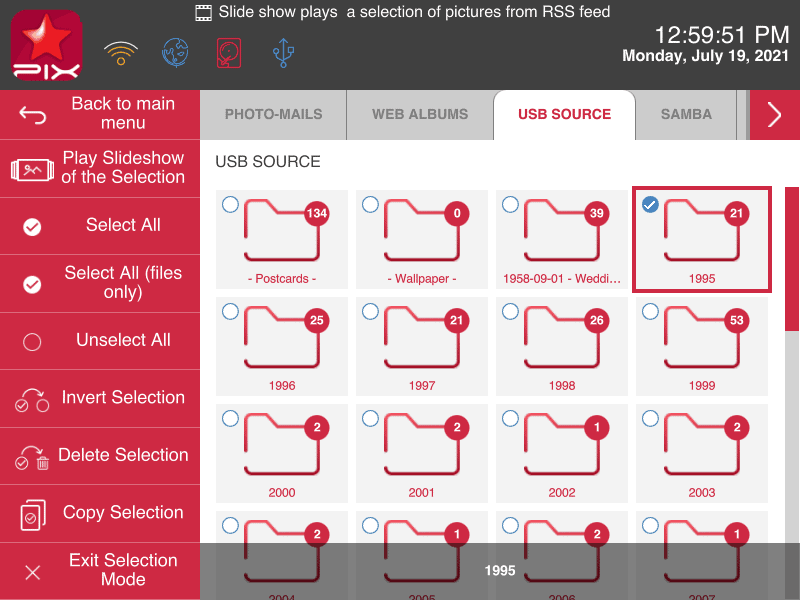
You can load pictures and videos to your Pix-Star frame by USB/SD card. It’s a great offline method that makes sending pictures without using Wi-Fi quick and easy. It’s great for elderly users and anyone that doesn’t have consistent internet access. Slideshows can be started directly off the USB/SD card without needing to copy the contents across to internal storage first.
Now you’re ready to start a slideshow with your favorite pictures and videos. Here’s a quick guide on how to start a slideshow on a Pix-Star frame no matter where you are. You can do it directly on the frame or remotely through the web interface.