
Time needed: 5 minutes.
Learning how to put pictures on a digital photo frame is the first step to getting more value for your home and family. We’ll show you the different methods for sending pictures to your digital photo frame using both online and offline ways. By the time we’re done, you’ll have all the tools and tips you need to send photos to your frame – no matter where you are in the world! Let’s get started!
- Email pictures to your digital frame

Emailing pictures to your digital photo frame is a very convenient and straightforward way to share your favorite pictures. Pix-Star’s frames are excellent at this as Pix-Star created & pioneered the idea of the digital frame with email.
To send pictures by email to your Pix-Star frame, simply add them as an attachment to the email. Make sure you don’t drag and drop them into the “body” section of the email as this might convert them to HTML – rather add them as attachments to be sure.
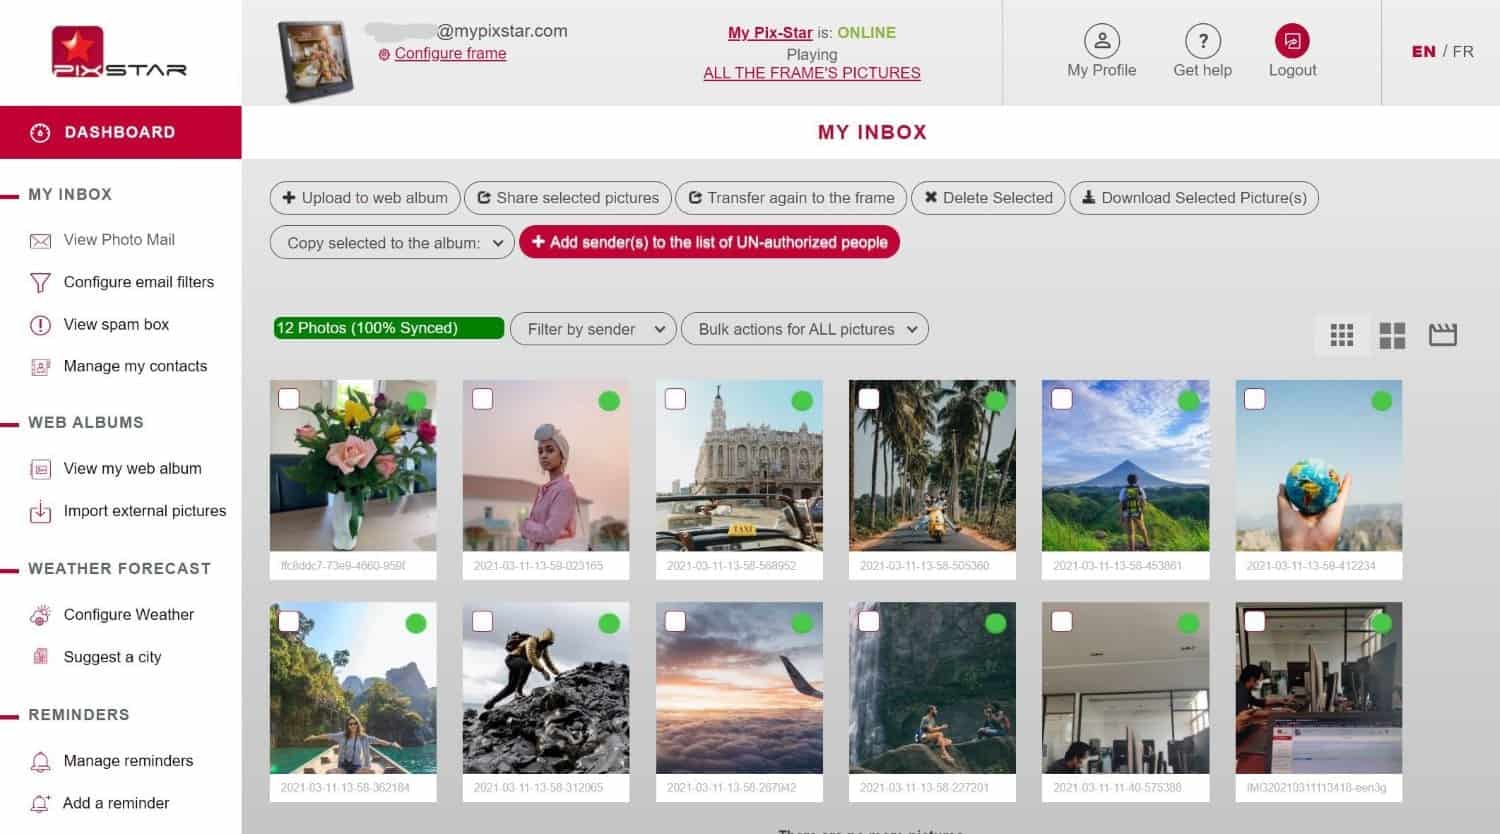
Send the email to your Pix-Star’s dedicated email address (xxxxxx@mypixstar.com). You can add as many email addresses as you’d like if you want to send these photos to multiple frames at the same time. You can then browse through all the received photos on your frame in the media gallery (as seen in the screenshot above).
Emailing pictures can be done from anywhere and at any time. Your Pix-Star frame can be set to automatically display photos that have been received by email. They’re saved to the frame’s internal storage and can be viewed in slideshows while the frame is offline. - Send photos, videos, and audio with the mobile app
The Pix-Star Snap mobile app offers arguably the most versatile and flexible way to send pictures to your frame. You can send up to 250 photos to multiple frames at the same time – perfect for families and users that like to share special memories on the go. The almost always have our smartphones with us wherever we go, so the convenience is nearly unparalleled.
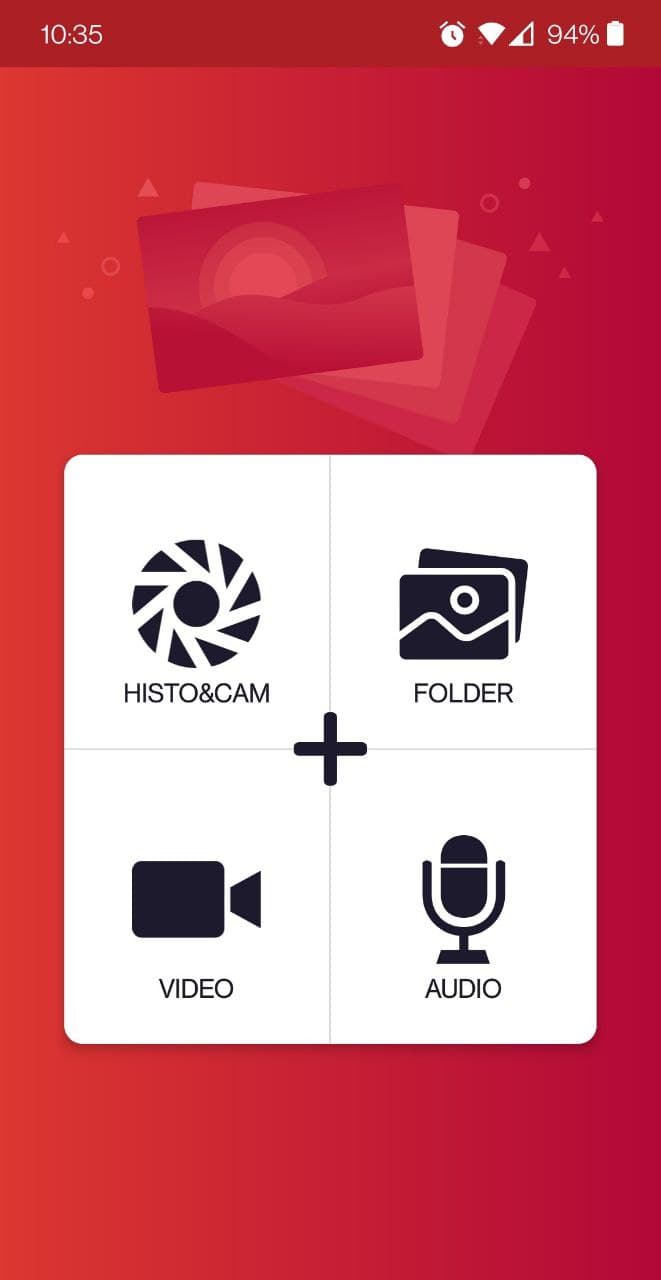
Download and install the Pix-Star Snap mobile app and select “Histo & Cam”. Here you can either capture a new photo directly through the app’s use of your phone’s camera, or you can swipe up to show your phone’s gallery. Select all the photos you want (press and hold to start multi-selection) and hit send.
You can then select all the frames you want to send the pictures to. If you need to send a frame for the first time, click “Add a New Frame” to follow the on-screen instructions. All you need is the frame’s dedicated email address.
Pix-Star’s frames also let you send entire folders and collections of photos to your frame. Click on “Folders” on the app’s home screen and select the folders and collections to send. Follow the same process as above.
All photos sent to the frame via the mobile app are found on your frame in the “Photo Mails” tab of the media gallery. You can create new folders & albums and start slideshows from a specific folder (or all the folders contained in this section). - Sync picture albums from your social media
Head over to pix-star.com and log in to your account using your frame’s email address and password. You can also log in to your multi-frame control account instead of an individual frame. Click on your frame’s name and address at the top of the display to enter your dashboard.
In the left-hand panel, under the “Web albums” section, click on “Import external pictures”. Here you can select from the list of supported platforms that store the photo albums you want to sync to your frame (i.e., Facebook, Instagram, Google Photos, Flickr, etc.). Click on your desired platforms and input your login information.
In the next window, you can choose all the albums you want to link to your Pix-Star frame. Choose the “Click to Link” option on the right side of the screen for each album you want to sync to your frame. This starts the process and can take a couple of minutes depending on the number and size of the photos.
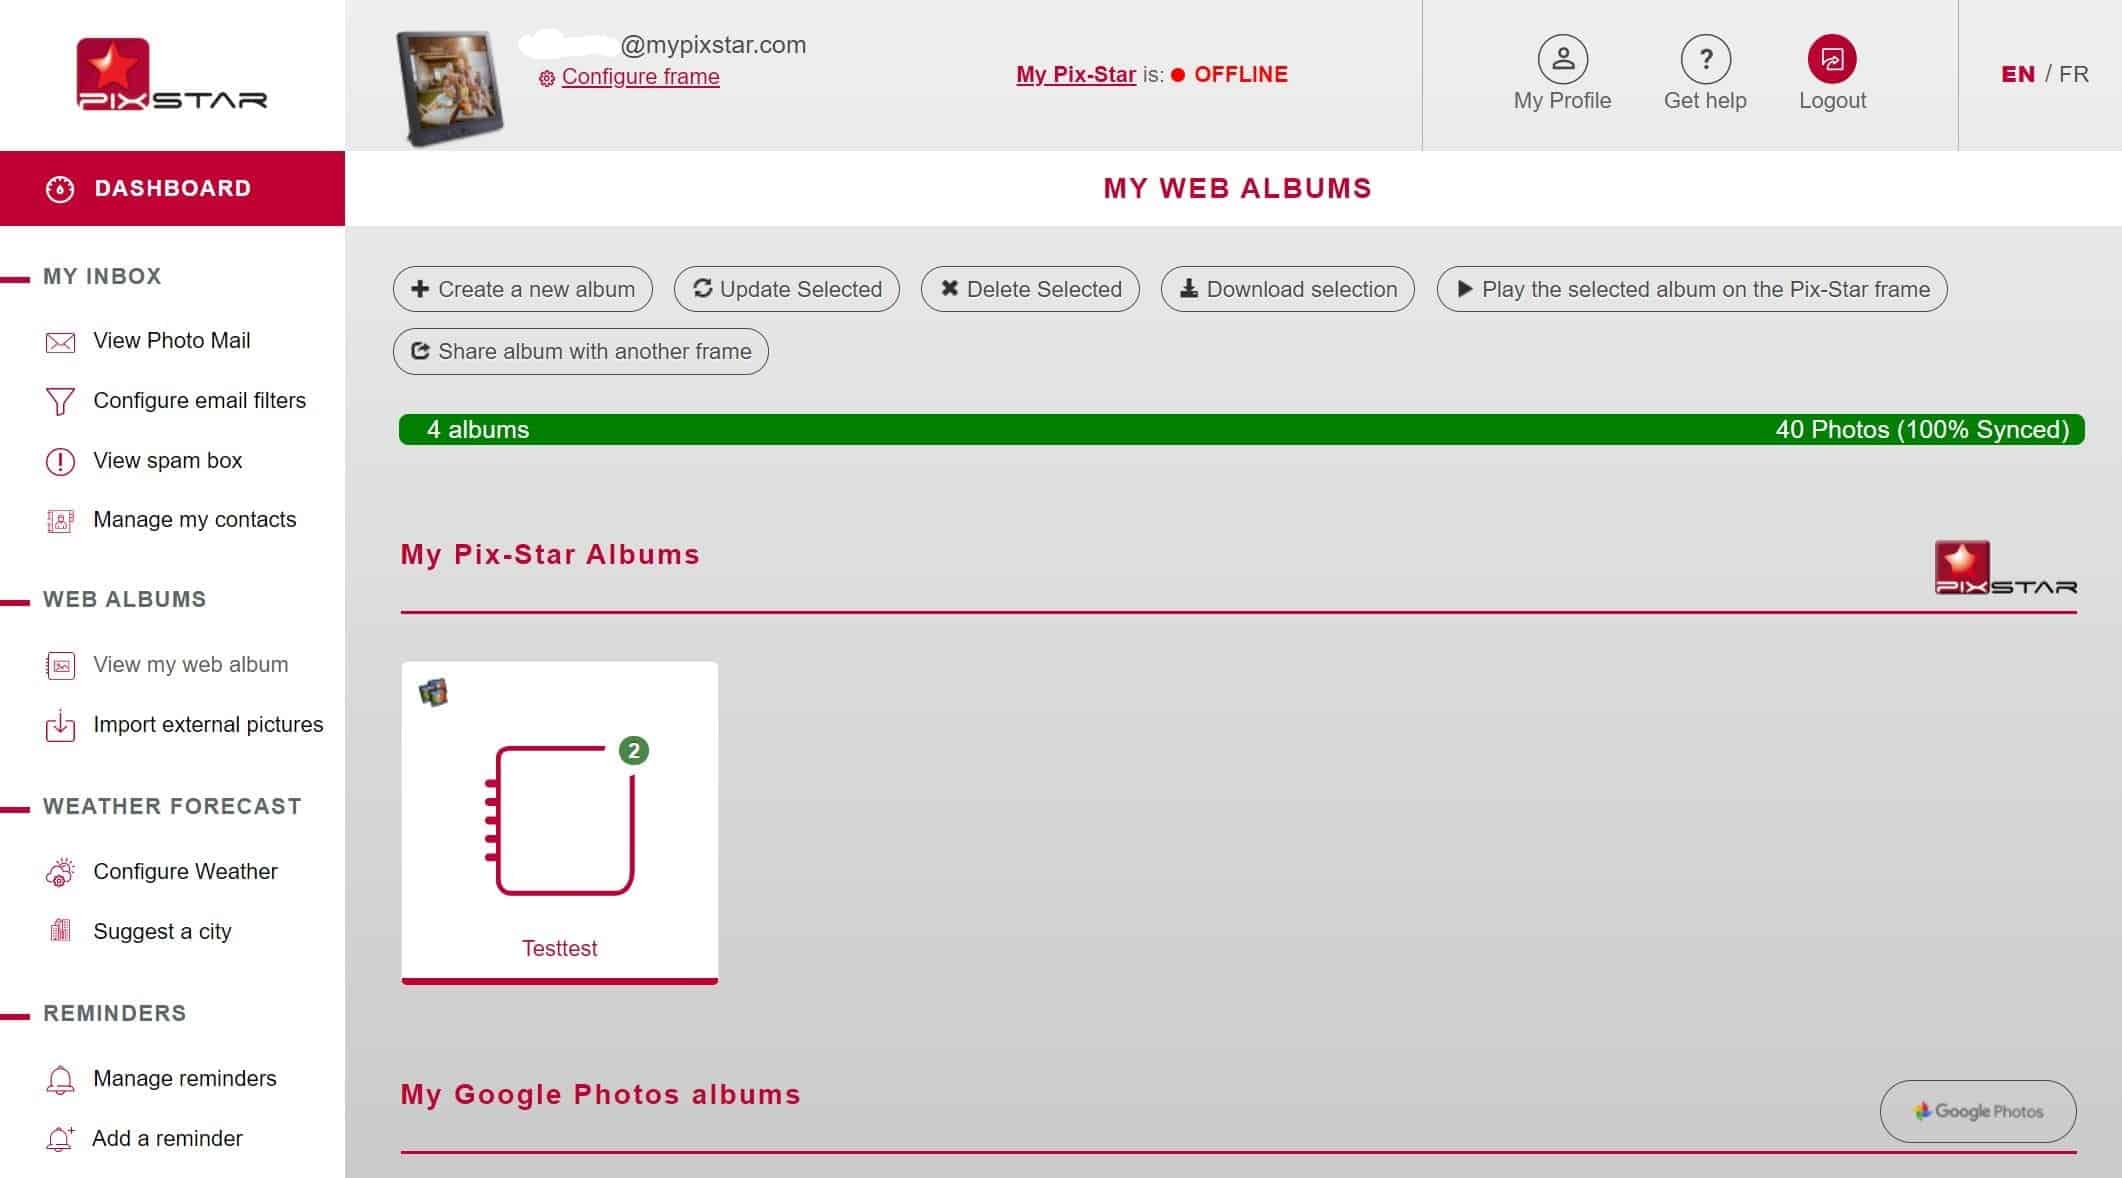
These synced web albums are available and browsable in the “Web Album” tab of the media gallery. All web albums and pictures linked from external sources are saved to the frame’s internal storage and are available offline.
Note that web albums are managed through the “View my web album” option in the left-hand panel of your Pix-Star frame’s dashboard. Deleting a web album photo on your frame doesn’t delete it permanently – this needs to be done through the web interface. Here’s a helpful guide on how to delete photos from your digital photo frame. - Load pictures by USB/SD card
Loading pictures by USB/SD card is a great offline way to send and view photos on your Pix-Star digital frame. It doesn’t require an active internet connection and Pix-Star’s frames support a wide range of USB/SD cards with no size restrictions.
From your PC or phone, load all the pictures onto the USB/SD card. Make sure the picture formats and the USB/SD card are compatible with your frame. Insert the USB/SD card into the frame’s relevant port and wait for the popup.
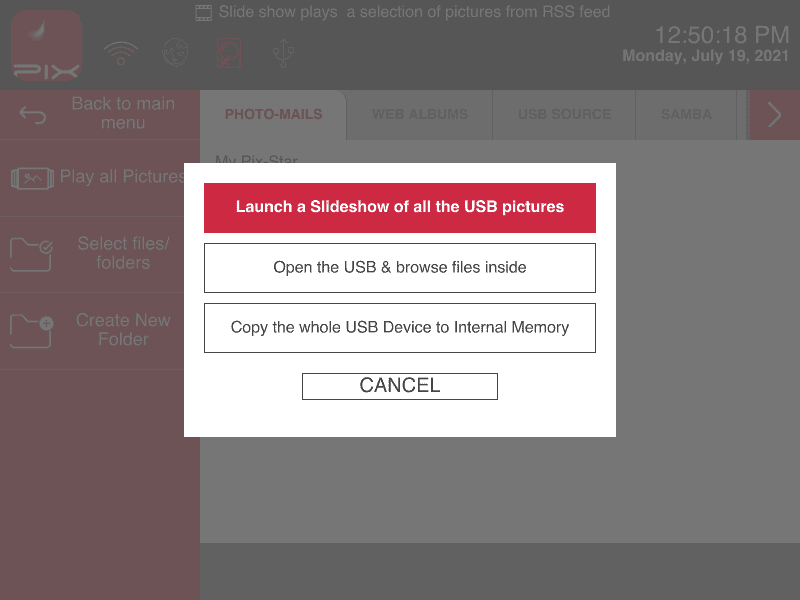
Select “Copy the whole USB device to internal memory” to copy everything across to your frame. This is a great option if you don’t want to leave the USB/SD card inserted all the time.
Alternatively, selecting “Open the USB & browse files inside” lets you manually select and copy folders and files across to your Pix-Star frame’s internal storage. This is a great option if you have a large USB/SD card with a lot of photos and don’t copy the entire storage across to your frame.
The third option is the “Launch a slideshow of all the USB pictures”. This starts with a slideshow with all the pictures on the USB/SD card. It’s a great plug-and-play feature but requires you to leave the USB/SD card plugged in at all times. If you remove the USB/SD card, the slideshow will be stopped.