
Time needed: 3 minutes.
Here we’re going to learn the simple steps on how to start a slideshow on a digital photo frame. We’re to focus on the Pix-Star digital photo frame for this guide as it’s one of the most versatile and capable frames on the market. The methods used here can be used to some other top digital photo frames, with some being specific to the Pix-Star frame. Let’s get started!
- Start a Slideshow with All the Frame’s Pictures


Pix-Star’s digital photo frames have a super-handy feature that lets you start a slideshow containing all the photos on the frame’s internal storage right from the home screen. Note that these slideshows are still controlled by the slideshow settings (which let you control the play order and frequency). You can choose to play recent photos more frequently or even to exclude older photos completely.
To start a slideshow with all the frame’s pictures, click on the “Play all the frame’s pictures” panel from the main menu. This can be done in just two button clicks and immediately starts a slideshow. You can adjust the slideshow settings by pressing the “Menu” button while viewing the photos.
Scroll down to “Slideshow options” and start adjusting settings to your preference. This is a great way to change slideshow settings without needing to leave the slideshow. It’s super user-friendly and great for elderly users as the menus are easy to follow and shallow. - Include Videos in Slideshows

You can include videos in slideshows on the Pix-Star digital picture frame. The videos need to be saved to the frame’s internal storage and need to meet the frame’s length and format requirements. To include videos in slideshows, press the “Menu” button while inside the slideshow. Scroll down to “Slideshow options” and press okay.
In the newly opened branch, scroll down to “Video-mail options”. Here you can choose between 3 options that let you include videos along with their sound, play the videos muted, or do not include videos at all. Note that the whole video will be played (up to a maximum of 2-minutes). The sound is played through the frame’s inbuilt speakers and can be set to a lower volume.
You can create a new folder in any of the directories in the “photo-mail” tab of the “My Media Library” and keep all your videos inside here. This lets you select the whole folder and start a slideshow with just the videos contained in the folder. - Start a Slideshow from Specific Folders/Files
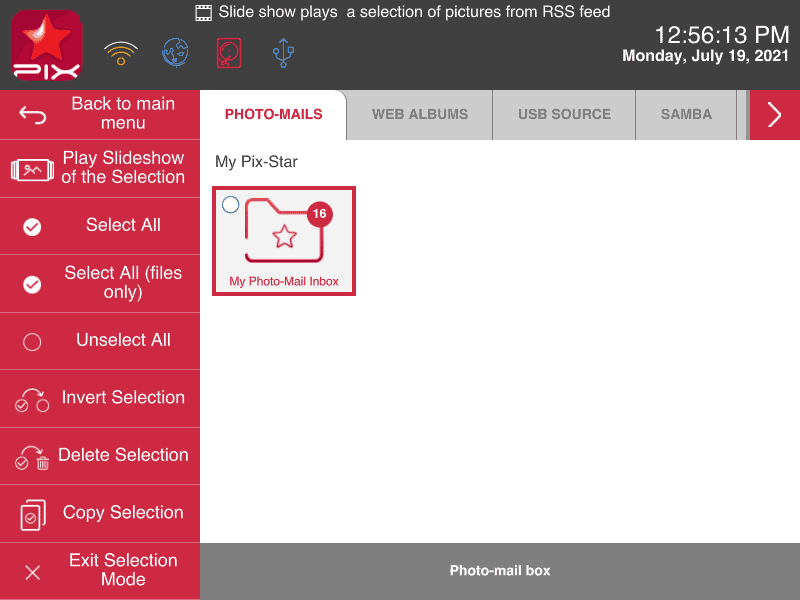
Go to “My Media Library” from the Pix-Star frame’s home screen. Here you can browse through all the sources that your frame has received photos from. Alternatively, you can browse through all the files and folders that have been created. You can manually create new folders and fill them with files (photos, videos, and audio files) to create customized and personalized slideshows. This can be done through either the web interface when importing web albums, or directly through the frame’s interface.
To start selecting, click on “Select folders/files” in the left-hand panel. You can then start selecting individual files or entire folders to play a slideshow from. Alternatively, you can go into a folder and manually select the files you want to include in the slideshow. Once you’ve made your selection, click on “Play slideshow from selection” in the left-side panel. This will start a slideshow that can be managed and controlled like a normal slideshow – just with a different source (as opposed to a slideshow with all the photos on the frame). - Start a Slideshow Remotely Via the Web Interface
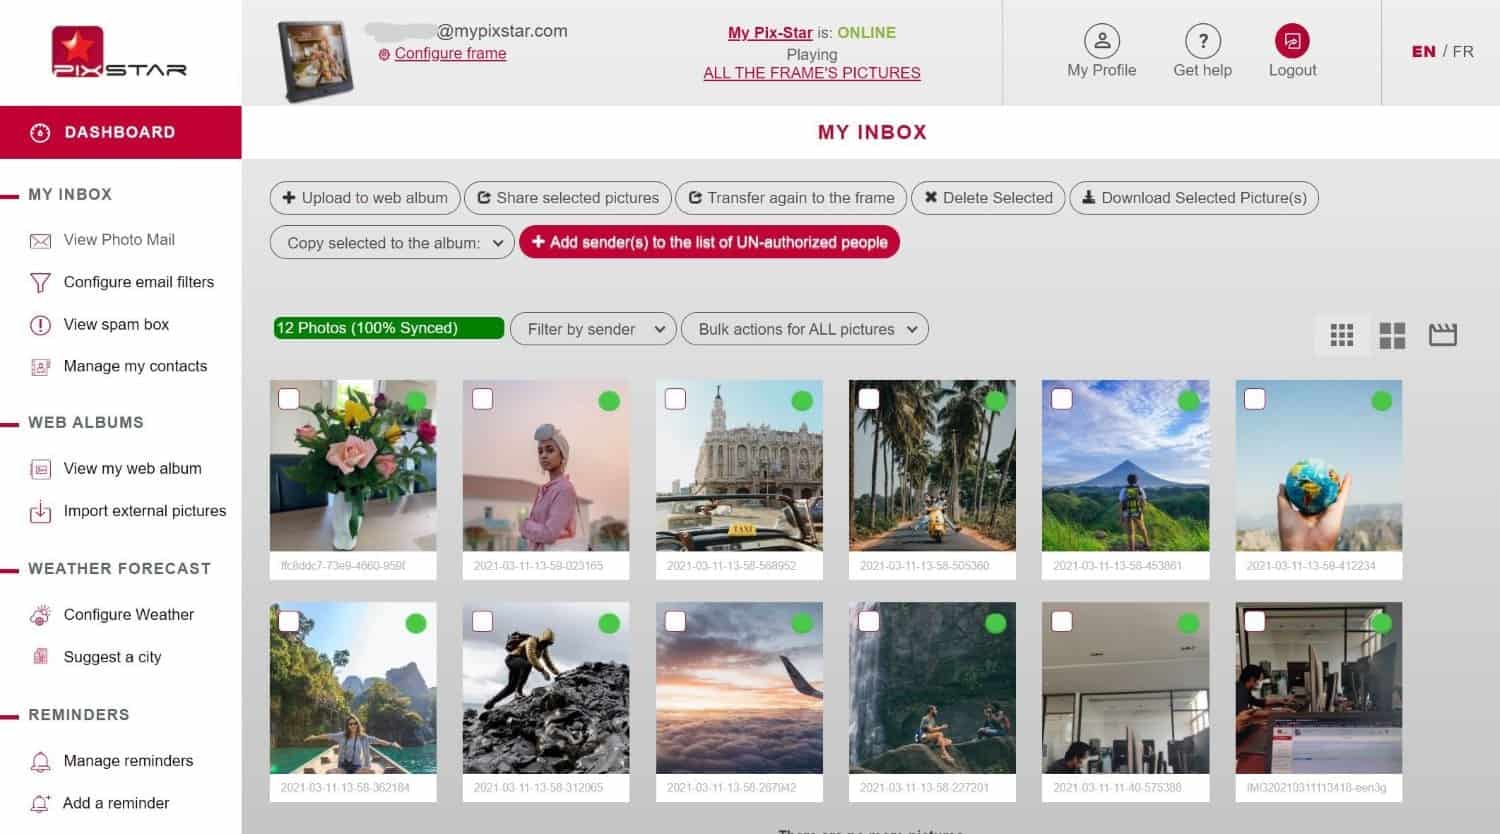
This is one of the Pix-Star frame’s most unique features that lets you remotely start a slideshow from anywhere in the world. All you need is access to a web browser (to access your frame’s dashboard) and an online Pix-Star frame.
Once you’ve logged into your Pix-Star frame’s dashboard or multi-frame control account, click on “Switch Slide Show” in the left-side panel. You might need to scroll down to the bottom of the panel to find it. Your Pix-Star frame needs to be online for this remote slideshow function to work.
Here you can start a slideshow with all the frame’s pictures by clicking on “Play all the frame’s pictures”. Alternatively, you can start a slideshow containing just the photos synced as web albums. To do this, click on “Play all web albums”. You can also start a slideshow from a specific web album, which is selected under the “Play a slide show of a specific web album”.
Finally, you can play all the photos from your Pix-Star frame’s photo-mail inbox. This includes all the photos sent to your frame from the mobile app and via email. It also includes any photos that have been copied into this category from a connected USB/SD card.
Note that all remotely started slideshows will still follow the slideshow rules set under the “Slideshow options” menu. This includes the play order, frequency, style, and speed controls.